Start with a tray of wallpaper glue. This glue keeps the paint floating on the surface in a thin film that will adhere to the paper to create the marbled effect. Using watered down acrylic paint, splatter a design on the surface of the glue. You can use as few or as many colors as you would like, and here is where the artistic flair comes in. After you have set the drops of paint over the glue, the design is technically done and able to be transferred to the paper, but we'll continue with the process.
Taking some sort of stick (the end of a paintbrush, a stir stick, a branch, etc), stir the glue in a zig zag pattern, starting from one end and going widthwise across the tray.
Around the beginning of the 18th century, the comb started to be used in marbling paper. Combs can vary in spacing, from extremely fine to extremely wide. Using different types of combs will create different effects. The comb is dragged across the surface lengthwise.
Then using a stick, the final touches are swirled into the paint, creating certain patterns that are known as peacock, flames, vortex, and many more.
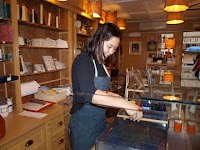
Some photos of me doing a marbled paper demo in Il Papiro, the paper store. The pattern I created in this demo was called flames.


And this is Gianni, the owner and the man I'm pseudo-apprenticing under:

No comments:
Post a Comment